Run your whole business with BrikTech
Step-by-step guides — with screenshots — for jobs, quotes, scheduling, selections, costs, invoicing, contracts, your client portal and Brix, your AI assistant. New here? Start at the top. After something specific? Jump to it below.
1 Getting started
Create your company account, sign in and let BrikTech set up your first job for you.
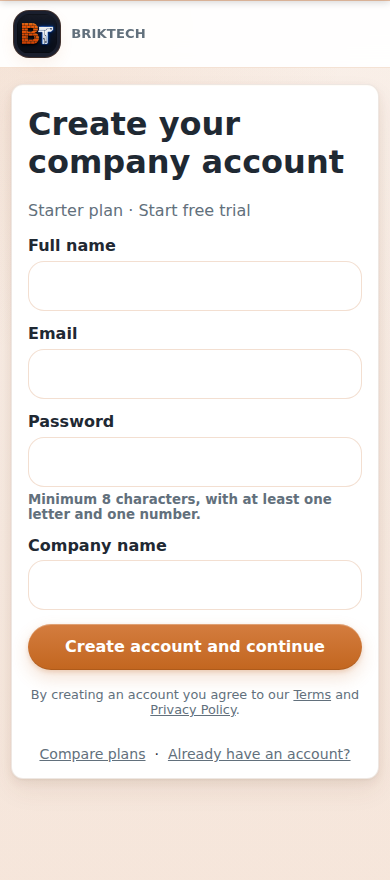
Create your account
- From the BrikTech home page, choose a plan and billing cycle (monthly or annual) and tap Start free trial.
- Enter your name, email, a password (at least 8 characters with a letter and a number) and your company name.
- Choose Create account and continue to start a 14-day free trial (no card needed), or Create account and checkout to subscribe straight away via secure Stripe checkout.
- That creates your company and makes you the company admin (the owner account).
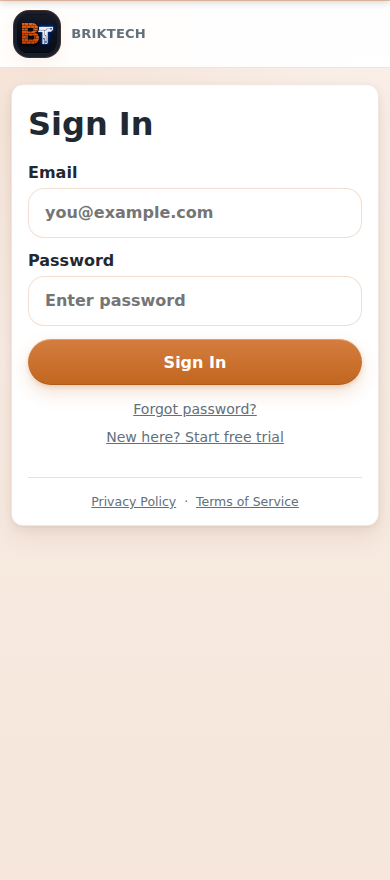
Sign in
Already have an account? Go to Sign in, enter your email and password. Forgot your password? Tap Forgot password and we'll email you a reset link.
2 Finding your way around
Your dashboard is home base. The bottom bar covers what you use most, the action tray adds anything, and Brix is one tap away.
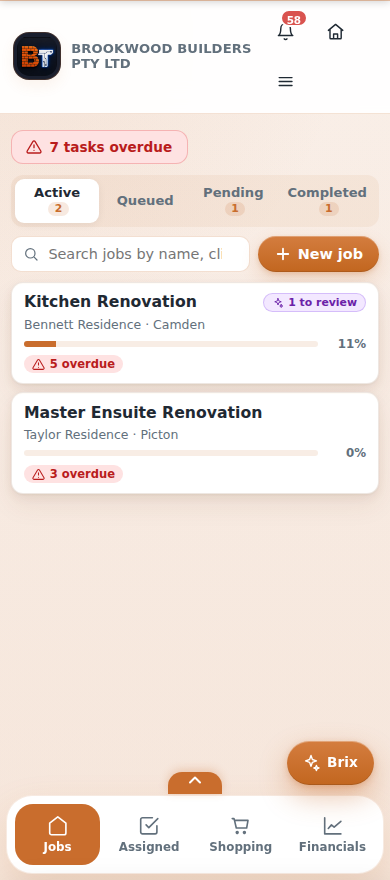
The dashboard
When you sign in you land on your company dashboard: overdue tasks at a glance, your jobs grouped by Active / Queued / Pending / Completed, a search box and a + New job button. Tap any job to open it.
Getting around
- Bottom bar: Jobs, Assigned (your tasks), Shopping, and Financials (admins) or More (everyone else).
- The action tray: the little chevron handle (⌃) above the bottom bar pulls up a tray to add anything — Create new job, Add task, Add shopping, Scan receipt, Scan QR, Create invoice, Add note, Add photo, Add variation. There's no floating "+" button anymore — this tray is where you add things.
- Brix pill (bottom-right): opens your AI assistant on any page (see §17).
- Top bar: a Home button, the notifications bell (a number means unread items — on a job page the badge moves onto the menu), and the ☰ menu.
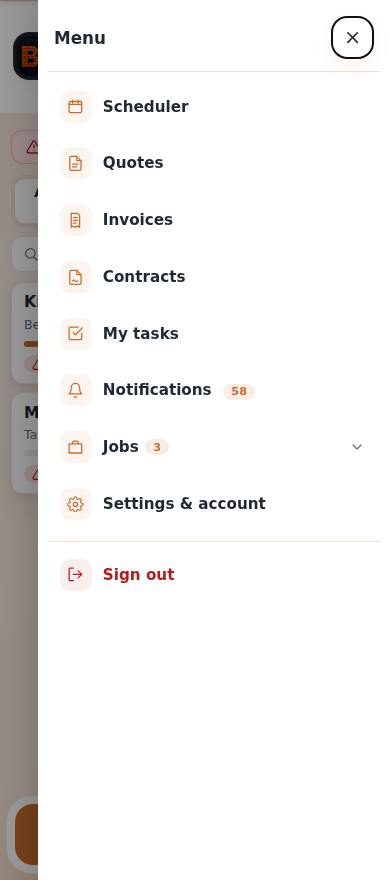
- Menu (☰): Scheduler, Quotes, Invoices, Contracts, My tasks, Notifications, the Jobs mega-menu, and Settings & account (where Profile, Billing, Team, Help and the rest live).

3 Jobs
Jobs are the heart of BrikTech. Each job holds its tasks, schedule, selections, shopping, photos, costs, contract and client portal in one place.
Create a job — three ways
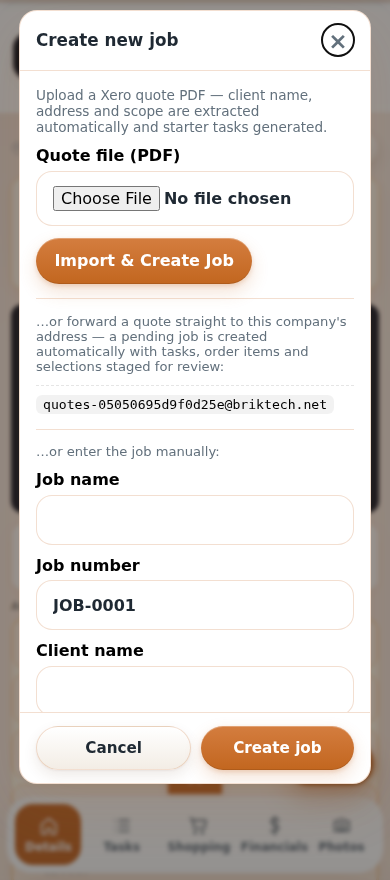
- Tap + New job on the dashboard (or Create new job in the action tray).
- Import a Xero quote PDF — BrikTech reads the client, address and scope and generates starter tasks; or forward a quote to your company's quote address and a job is staged automatically with tasks, order items and selections to review.
- Or enter it manually — job name, client, site address (start typing for suggestions). Paste a scope of works and BrikTech suggests tasks.
- Tap Create job — it's ready to work on.
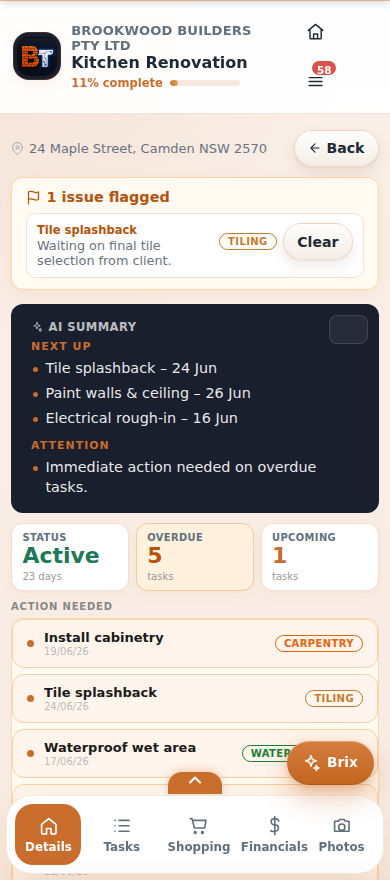
Working inside a job
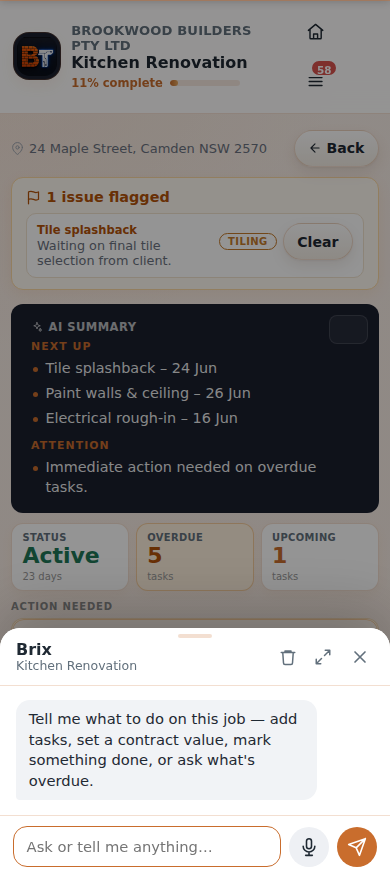
The job opens on Details, with an AI summary (what's next, what needs attention), status tiles, and the work that needs action. Use the tabs along the bottom — Details, Tasks, Shopping, Financials (admins) and Photos — and inside Details you'll find expandable sections for Notes, Selections, Variations and Activity.
Job statuses
Jobs move through Pending (queued), Active (in progress), and Completed. A job completes automatically when all its tasks are done, and re-opens if you add more. You can also archive old jobs.
4 Quotes New
Win the job first: book a site visit, capture it, and send a priced quote the client can accept online — then turn it into a job in one tap.
- Open Quotes from the menu and tap + Schedule quote to book an on-site visit — it shows up in your scheduler.
- On site, capture the job: rooms, photos and the client's selections.
- BrikTech drafts an AI scope and a priced estimate with supply & install line items. Tweak the prices.
- Send it to the client. They review and accept (or decline) on a secure link.
- An accepted quote becomes a job — with its tasks, order items and selections already staged.
5 Tasks & who does what
Break a job into tasks, assign them to your crew or a trade, set due dates, and track them to done.
Add & assign tasks
- On a job, open the action tray and tap Add task (or use the Tasks tab).
- Give it a title, a trade (plumbing, electrical, tiling…), a priority and a due date; you can attach photos and add shopping items at the same time.
- Assign it to a team member or a trade contact — it lands in their list.
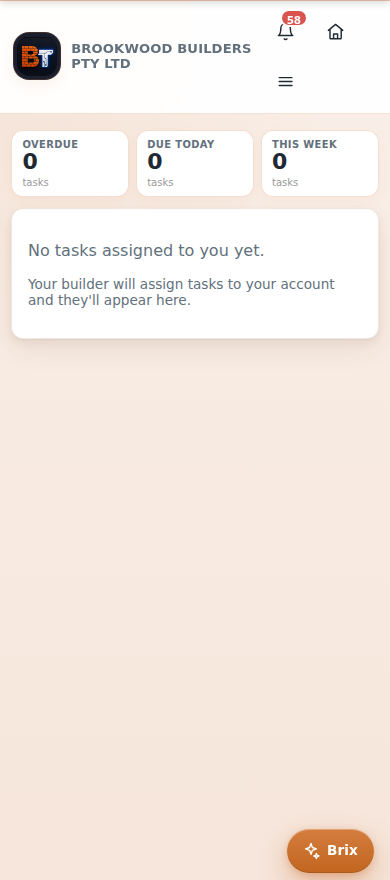
My tasks
The My tasks screen (in the menu, or Assigned in the bottom bar) gathers everything assigned to you across all jobs, grouped by what's due. Tap a task to mark it done — you'll be prompted to add a photo if it helps.
Task statuses are To-do, In progress, Waiting and Done. You can also flag a task with an issue to raise it with the builder.
6 Scheduling work
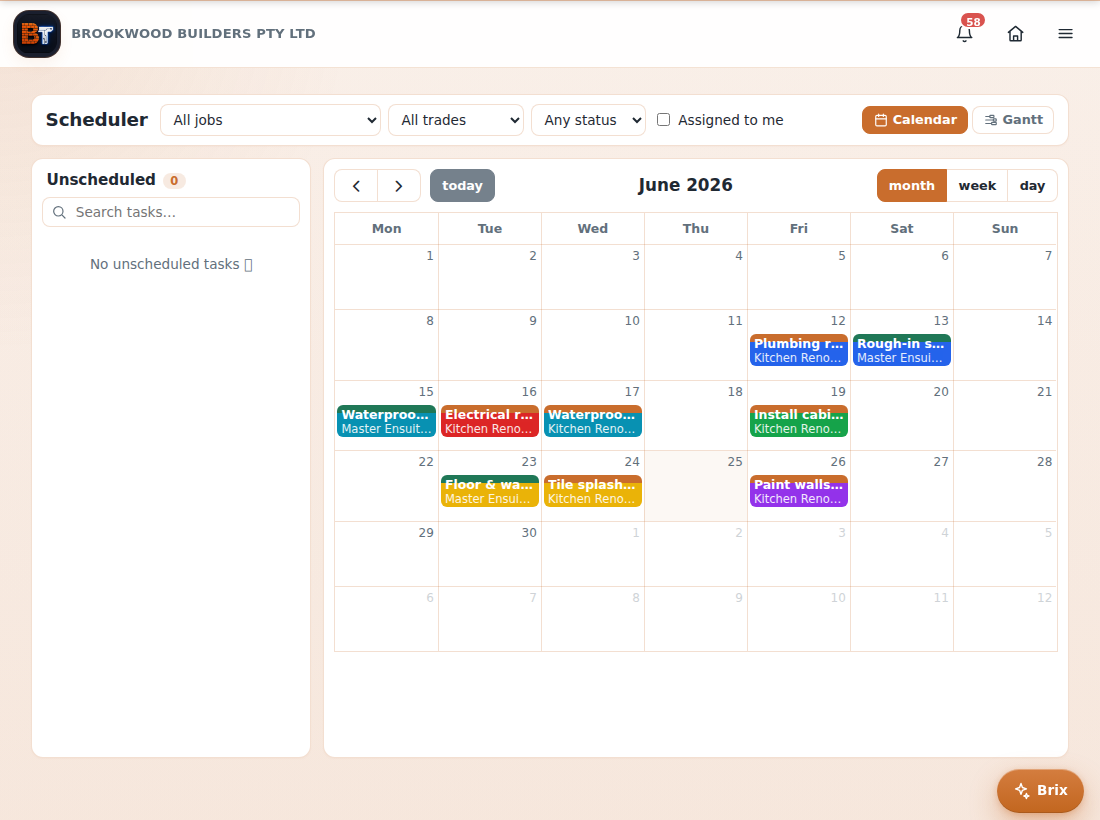
See every scheduled task across all jobs on one calendar.
- Open Scheduler from the menu.
- Switch between Calendar and Gantt views, and filter by job, trade or status.
- On a computer, drag a task from the Unscheduled list onto a day to schedule it (drag-and-drop is desktop-only; on a phone, set the date on the task).
- Each bar is colour-coded by job and trade, and your booked quotes appear on the calendar too — so you can see your whole week at a glance.
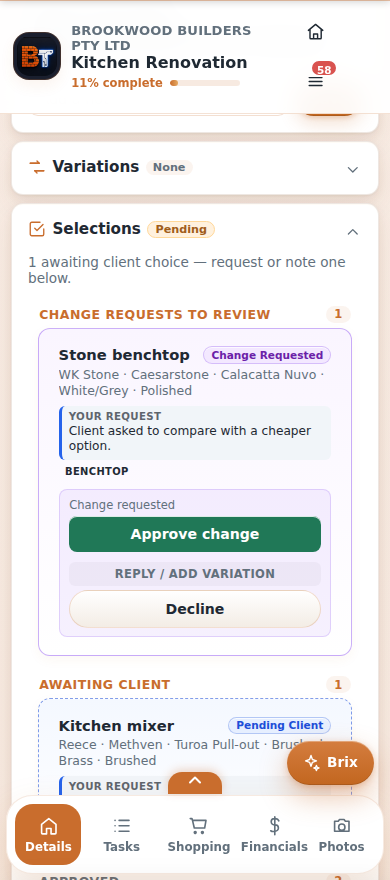
7 Client selections
Track every client choice — tapware, tiles, benchtops, appliances — against its allowance, and let clients approve them from their portal.
- In a job's Details, open the Selections section and add one.
- Choose Client to Choose (ask the client to pick) or Builder Selection (record one yourself). You can also upload a selection sheet and let BrikTech read it.
- Add the item, brand, supplier, allowance and price.
- Clients see and approve selections on their portal, or request a change — which lands in your Change requests to review list, where you can approve, decline, or reply with a revised price (variation).
Selections move through Awaiting client → Pending approval → Approved → Ordered → Installed (with Rejected and change-requests handled separately).
8 Shopping lists
Keep a running materials list per job (and across the company) so nothing's forgotten on the supplier run.
- Open the Shopping tab on a job, or Shopping in the bottom bar for the whole company.
- Add an item with its name, supplier and quantity (the company list also lets you tag a job, or "General"). Open an item to add a lead time or notes.
- Tick items off as you go — they move from To buy to Purchased.
- Search, filter (by status or supplier) and sort (date, name, lead time) to plan the run.
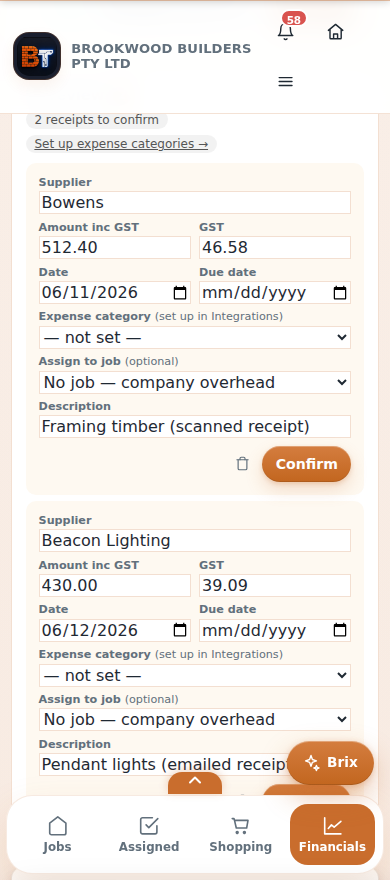
9 Costs & receipts
Capture every dollar that goes out — snap a receipt, forward a supplier email, or just text a photo.
- Scan a receipt with your camera — BrikTech reads the supplier, date and amount.
- Forward a supplier invoice email to your company's cost address, or text a receipt photo to Brix over WhatsApp or SMS — it lands automatically.
- New receipts wait in the To review card in Financials. Check the details, set the expense category, assign it to a job, and Confirm.
- BrikTech flags likely duplicate receipts so you can keep or remove them. Confirmed costs roll up into each job's budget and your financials.
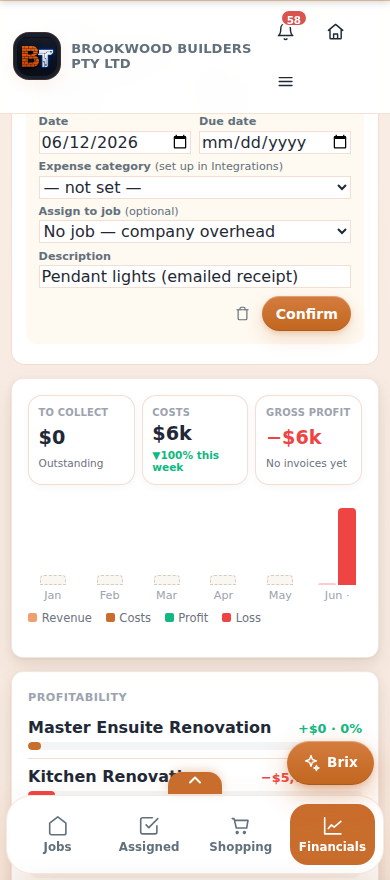
10 Financials Admins
A company-wide view of money in and out, plus profit by job.
Open Financials from the bottom bar. The top three cards show To collect, Costs (with a 7-day trend) and Gross profit (margin %), with a month-by-month revenue/costs/profit chart and a profitability breakdown per job. Above them sit the Ready to invoice and To review cards, and the tabs — Costs, Invoiced, Overdue, Total due — drill into the detail. Connect Xero (see §16) to pull invoice figures in automatically.
11 Invoices & customers New Admins
Bill clients directly from BrikTech — no Xero required (though it syncs if you use it).
- Open Invoices (menu or Settings & account) and tap + New invoice, or use Create invoice in the action tray.
- Pick the customer and add line items — or raise a progress claim straight off a contract's payment stages.
- Send a branded PDF invoice; BrikTech can chase it with reminders and shows what's paid, due and overdue.
- Customers stores each client's billing details so they're reused across invoices.
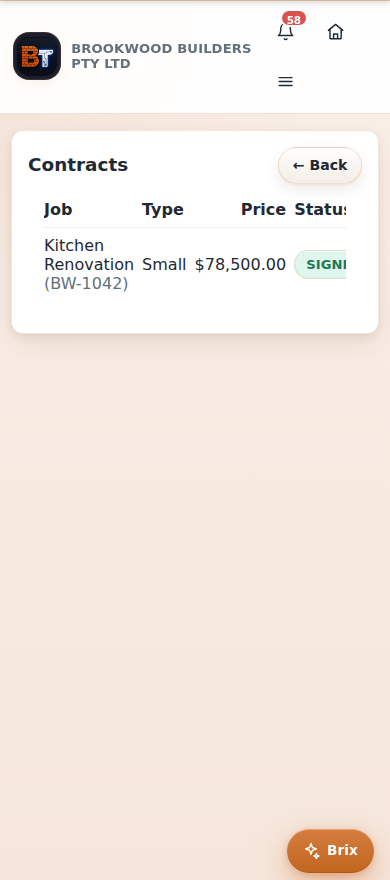
12 Contracts & e-signing
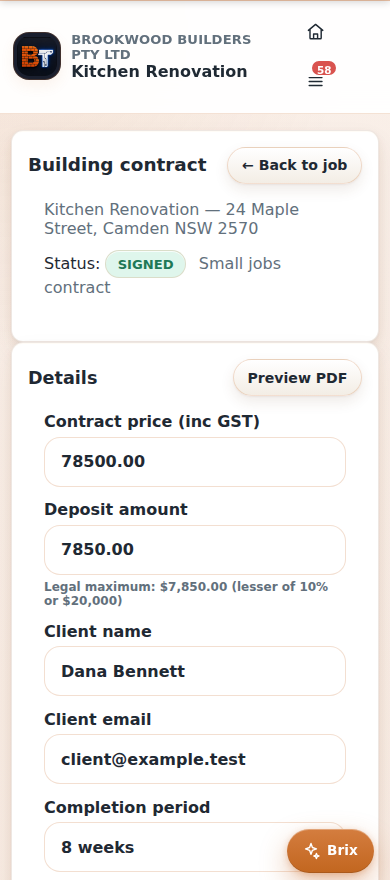
Generate the right NSW building contract, set payment stages, and have your client sign it online.
- In a job, open Contract. BrikTech prepares the right type — a NSW Small jobs or Large jobs contract — based on the job's value and location.
- Set the contract price and a payment schedule (each stage a name + %, totalling 100%, with a live $ preview). You can push the stages to Xero as draft invoices.
- You (the builder) sign first on the signature pad — that unlocks Send to client.
- The client opens a secure link, reviews and signs electronically; you get the signed copy back, with a full audit trail.
Manage all your contracts from Settings & account → Contracts, where each shows its status: Draft, Sent, Viewed, Signed or Countersigned.
13 The client portal
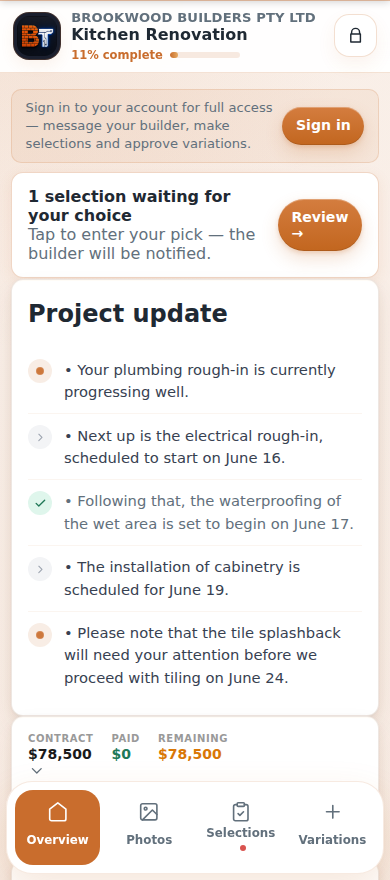
Give clients a live window into their job — print the QR on a site sign or send the link.
- Every job has a unique QR code and share link. Clients scan to view progress — no app to download.
- The portal has four tabs — Overview, Photos, Selections, Variations — with a project-update timeline and a Payments summary (contract value, paid, remaining, invoices).
- When a client signs in, they can approve selections, add their own, upload photos, message you, request variations, and accept variation costs with a signature. You're notified instantly.
14 Your team & access Admins
Invite staff and trades, and control who can see what.
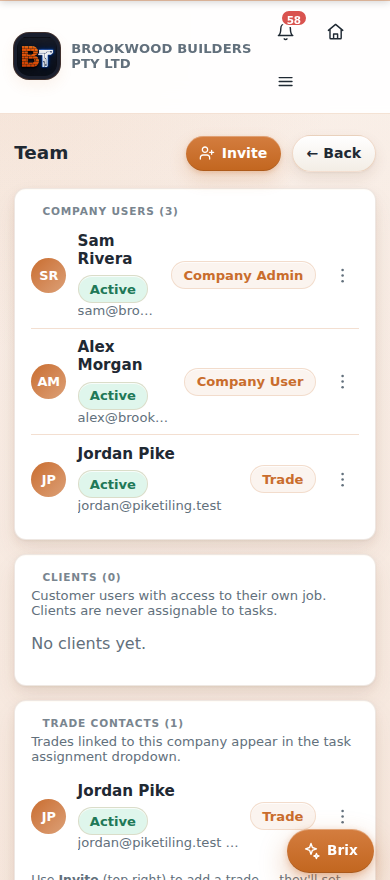
- Go to Settings & account → Team and tap Invite.
- Invite by email or mobile and pick a role.
- They get an invite link (you can resend, copy or revoke it), set a password, and they're in.
Roles:
- Company admin — full access including financials, billing and settings.
- Company user — day-to-day staff; can run jobs and scan receipts, but can't see financials or cost amounts.
- Trade — linked to one trade; sees only the jobs and tasks they're assigned.
- Client — sees only their own job's portal; never assignable to tasks.
People can also request access to a job by scanning its QR — you approve or decline.
15 Settings & account Admins
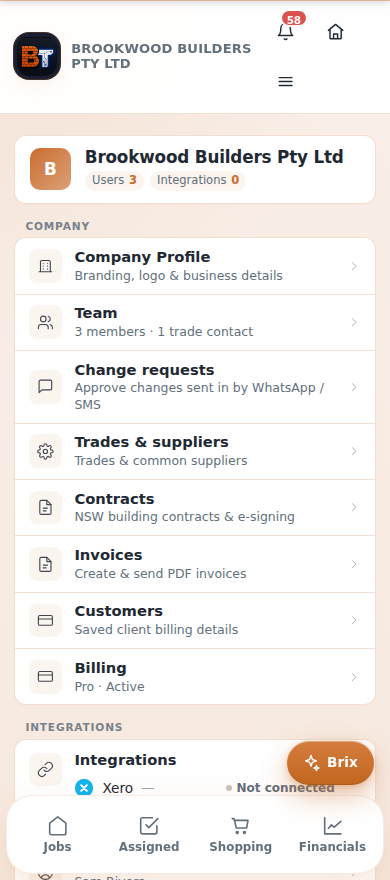
One hub for your business setup — reached from More / Settings & account.
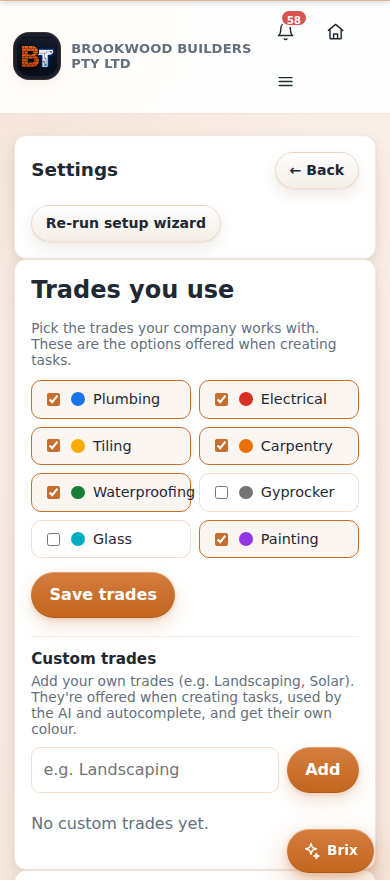
From here you can reach Company Profile (name, logo, brand colour, licence, ABN, address), Team, Trades & suppliers, Contracts, Invoices, Customers, Billing, your Integrations, and your Account (Profile, Help & FAQ, Notification preferences, Send feedback). It also surfaces Change requests — edits clients or staff sent in by WhatsApp/SMS — for you to approve or decline.
16 Xero & integrations Admins
Connect the tools you already use.
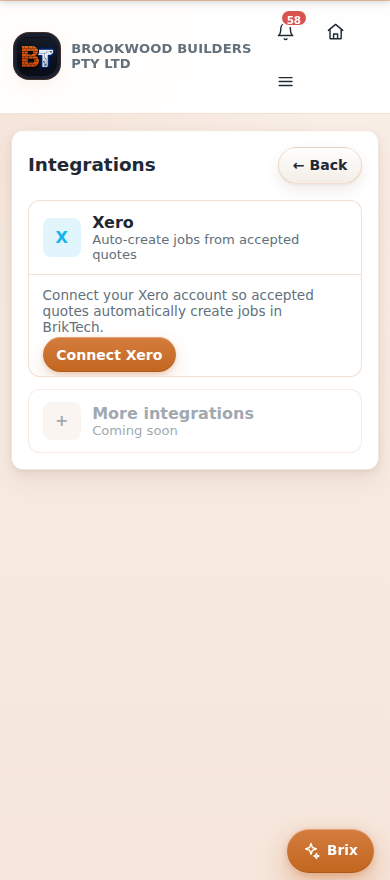
- Xero: connect once to auto-create jobs from accepted quotes, sync invoices and bills, and keep your figures matching your books. When Xero's connected, you can also map scanned/forwarded receipts to the right expense accounts.
- Google Calendar: two-way calendar sync is rolling out (currently limited while Google reviews our app).
Find them under Settings & account → Integrations. Each is optional and can be disconnected any time. (Browser push notifications are switched on under Notification preferences, not here.)
17 Brix & texting from site
Brix is your AI assistant — built into the app on every page, and reachable by text message.
In the app
- Tap the Brix pill (bottom-right). It knows which job, quote or tab you're on.
- Type or speak — "what's overdue?", "add roofing screws to the shopping list", "log a note", "set the contract value to $80k", "mark plumbing rough-in done", "create a quote".
- For anything that changes data, Brix shows a confirm card first — nothing happens until you approve it, and every action is logged.
By WhatsApp & SMS New
Brix also works over WhatsApp and SMS. Once your mobile number is on your profile, just text Brix from site — ask what's on today, add a task or note, update shopping, or send a receipt photo and it becomes a cost in Financials → To review. No app needed in your hand.
18 Notifications
BrikTech tells you when something needs you — and you choose how.
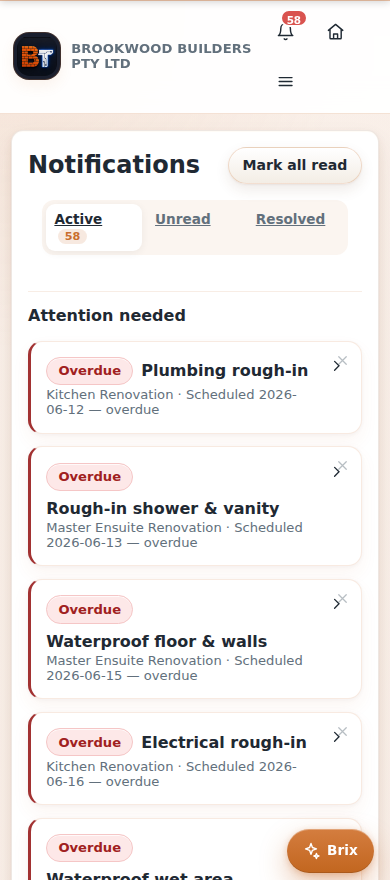
Tap the bell or open Notifications from the menu. Mark items read, dismiss them, or jump straight to what they're about. Under Notification preferences you control every category — task assignments, schedule changes, overdue tasks, client selections and variations, progress photos, site-access requests, Xero imports, and a daily briefing (6:30am, optionally by SMS) — and switch on push notifications so BrikTech can reach you even when the app is closed.
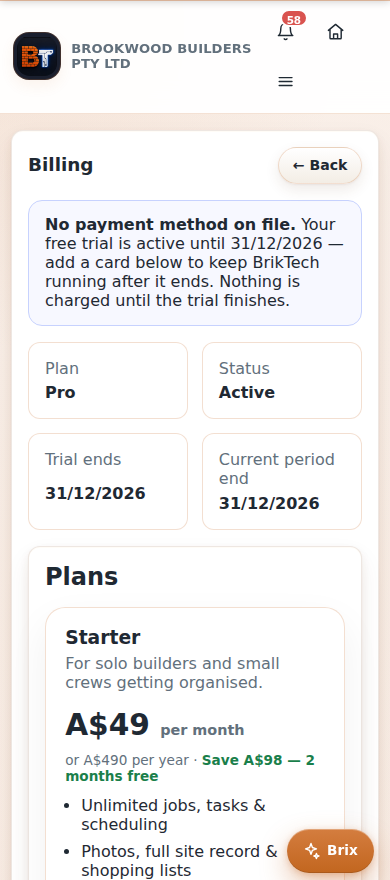
19 Billing Admins
Manage your plan and payment details securely through Stripe.
- Open Billing (menu → Settings & account → Billing) to see your current plan and status.
- Tap Manage billing to open the secure Stripe portal — update your card, change plan or download invoices.
- If a payment fails or a trial ends, you'll be guided to fix billing before continuing. Your data is always safe.
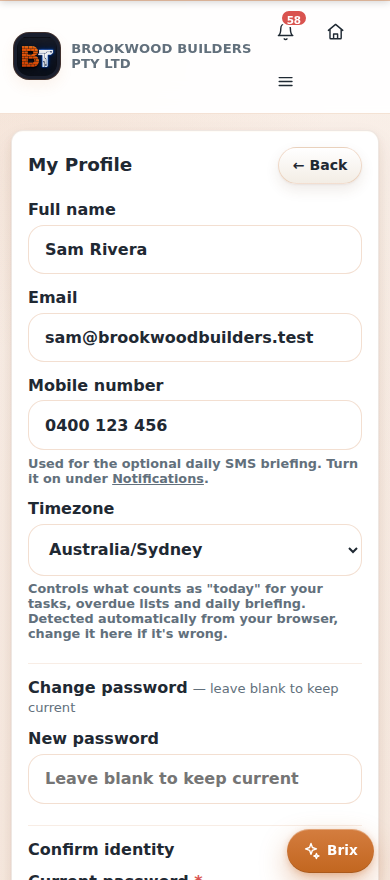
20 Your profile
Your personal account settings.
Open Profile (Settings & account → Profile) to update your name, email, phone, timezone and password. Your mobile number is what lets Brix recognise you over text, and your timezone keeps due dates and the scheduler accurate. You can also delete your account here.
21 For trades & subbies
If a builder has added you as a trade, BrikTech gives you a focused view of just your work.
- Jobs: the jobs you're working on.
- Assigned tasks: everything assigned to you, with due dates — mark them done and add photos.
- Shopping: add the materials you need to the job's list.
- Scheduler: your scheduled work across jobs.
- Settings: set your trade business name — trades sharing a name share one combined shopping list.
You only ever see the jobs and tasks you've been given access to — never the builder's costs or other trades' work.